Replacing an old kitchen faucet with a new one can instantly refresh your space and improve functionality. Whether you’re upgrading for style, efficiency, or fixing leaks, installing a kitchen faucet is a manageable DIY project – even for beginners! This guide will walk you through the process, step by step.
Tools & Materials Needed
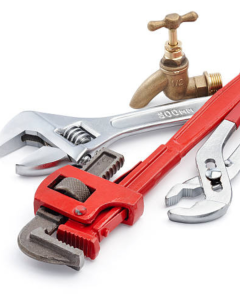
Before starting, gather the following tools and materials:
Adjustable wrench
Basin wrench (for hard-to-reach spots)
Bucket & towels (to catch any water spills)
Plumber’s tape (for secure connections)
Plumber’s putty or silicone sealant
New kitchen faucet (with necessary parts included)
Supply lines (if not included)
Step 1: Turn Off the Water Supply
Before removing your old faucet, turn off the water supply by shutting off the valves under the sink. These are usually located on the hot and cold water lines. If your kitchen doesn’t have shut-off valves, turn off the main water supply to your home.
Tip: Turn on the faucet to drain any remaining water and release pressure in the lines.
Step 2: Disconnect the Old Faucet
- Disconnect the supply lines – Use an adjustable wrench to loosen and detach the hot and cold water supply lines. Place a bucket or towels underneath to catch any drips.
- Unscrew the mounting nuts – Use a basin wrench to remove the nuts holding the faucet in place from underneath the sink.
- Lift out the old faucet – Once everything is disconnected, pull the faucet up and out of the sink.
Tip: If the faucet is stuck due to old sealant, gently wiggle it or use a putty knife to loosen it.
Step 3: Clean the Sink Area
With the old faucet removed, clean any dirt, grime, or leftover sealant from the sink area using a cloth and mild cleaner. This ensures a smooth surface for the new faucet installation.
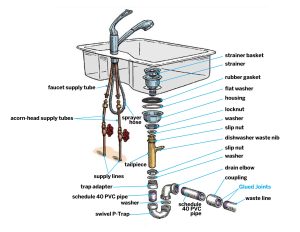
Step 4: Install the New Faucet
- Position the faucet – Place the new faucet through the mounting holes on the sink. Most faucets come with a rubber gasket or base plate to create a watertight seal. If not, apply a thin layer of plumber’s putty or silicone around the base.
- Secure the faucet – Under the sink, tighten the mounting nuts to hold the faucet in place. Hand-tighten first, then use a wrench for a snug fit (avoid over-tightening).
Tip: If you have a pull-down or pull-out sprayer, ensure the hose moves freely and doesn’t tangle under the sink.
Step 5: Connect the Water Supply Lines
- Attach the supply lines – Connect the hot and cold water supply lines to the corresponding valves under the sink. Use plumber’s tape on the threads for a secure seal.
- Tighten the connections – Hand-tighten first, then use a wrench to ensure a firm but not overly tight connection.
Step 6: Check for Leaks & Test the Faucet
- Turn the water supply back on – Slowly open the shut-off valves.
- Check for leaks – Inspect all connections under the sink. If you see any drips, tighten the fittings slightly.
- Run the faucet – Turn on the hot and cold water to test the flow and check for leaks at the base.
- Test the sprayer (if applicable) – Ensure smooth operation of any pull-down or pull-out features.
Tip: Run water for a few minutes to flush out any debris from the new installation.
Step 7: Final Touches
- Wipe down the faucet and sink area to remove fingerprints and excess sealant.
- Organize the hoses under the sink to prevent tangling.
- Enjoy your new kitchen faucet!
Troubleshooting Common Issues
Leak at the base of the faucet – Ensure the gasket is properly positioned or apply additional plumber’s putty.
Low water pressure – Check if the aerator is clogged with debris; remove and rinse it.
Hoses are tangled – Secure them with a clip or weight to allow smooth movement.
Installing a new kitchen faucet is a rewarding DIY project that enhances both functionality and aesthetics in your kitchen. With the right tools and a step-by-step approach, even beginners can tackle this upgrade confidently.
The Great Plumbing Co.
For nearly three decades, The Great Plumbing Co. has been providing exceptional plumbing services for homeowners as well as business owners throughout Toronto and the GTA. Whether you’re dealing with a leaky hose bib, a clogged drain, or a toilet repair and service you can trust The Great Plumbing Co. to deliver timely solutions tailored to your specific requirements.
Contact us or book online to schedule your residential plumbing appointment.